Connect to UAlaska (Android)
How to connect to UAlaska on Android
This guide will help you in configuring your Android device to connect to the UAlaska Wi-Fi.
Quick Settings:
Please note that some devices may require fewer of these options than others to be
configured.
Fill in any options that match the below on your device:
| Setting Name | Value |
| Identity | Your UA Username (without '@alaska.edu') |
| Password | Your UA Password (managed in ELMO) |
| EAP Method | PEAP |
| Phase 2 Authentication | MSCHAPv2 |
| CA Certificate | Don't Validate ('Use System Certificates' is acceptable if this is not an option.) |
| Online Certificate Status | Don't Validate |
| Domain | alaska.edu |
| Anonymous Identity | anonymous |
| MAC Address type | Phone MAC |
| IP settings | DHCP |
| Proxy | None |
| Metered Network | Detect Automatically |
Full Guide with Visuals:
Step 1: Open the Settings app on your phone, and select the Wi-Fi menu.

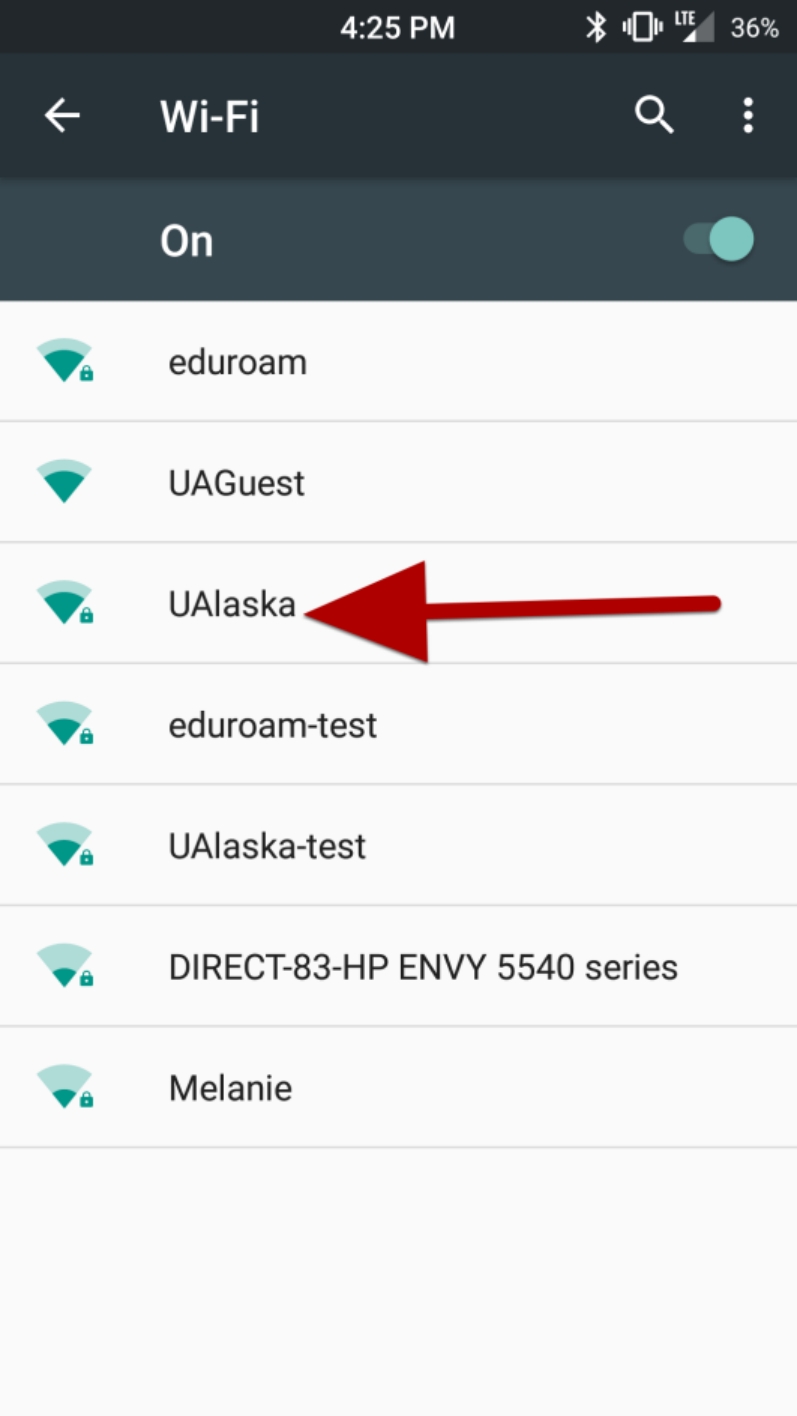
Step 2: Select the UAlaska network.

Step 3: Confirm that the EAP method is PEAP, there is no Phase 2 authentication, and the CA certificate is (unspecified). Then scroll down. On some Android phones, Phase 2 authentication must be set to MSCHAPV2, if None is not an option.
On some newer Android phones the CA certificate setting is None. Some phones also require the domain to be specified as alaska.edu.

Step 4: Enter your UA Username in the Identity field and scroll down to enter your password.

Step 5: Enter your UA password in the password field and then tap Connect.

You are now connected to the UAlaska Wi-Fi network. This screen might say Obtaining IP Address for up to 10 seconds before saying Connected.


